
Replacing a broken string is done in much the same way as you put a new string on, with a few exceptions. However, recognizing that not everyone will want to wade through the entire building process to find this information, I thought it would be convenient to repeat this information on one specific page. For a more in depth look, you may wish to see the entire stringing process from start to finish.
What follows below has mostly been cut and pasted from other parts of the site, with some added advice along the way. This will give a good overview of how to replace a broken string on your bowed psaltery.
First thing’s first: you need to remove the old string. If the string is just old or beat up, or somehow unplayable – but not technically broken – then you want to make sure and remove all the tension on the string before cutting it. Use the tuning wrench and loosen the string until it is loose as a goose, then cut it in the middle.
Remove the remnants of the string from both ends – the hitch pin and the tuning pin. I have found that the best way to do this with the least amount of damage to the instrument’s finish, (and not to mention your fingers!) is to use a wire cutters to actually pull the string from its hole.
Trying to wrestle a thin, sharp piece of music wire from its den with your bare hands will only invite bloodshed. I’ve found that a tiny pair of wire cutters work even better than a pair of needle-nose pliers. It takes quite a bit of force to actually cut through the wire, and if you grasp it with maybe half of this pressure, it will be more than enough to yank the wire free on both ends.
Once you’ve got the string completely removed, you need to do one more thing before you can proceed to stringing a new wire on: you need to adjust the tuning pin to the right height. Basically, when the string was put on, the tuning pin started much higher up in its hole, and was wound down into the hole as the string was being wrapped around the pin.
In our case, we need to restore this tuning pin back to its pre-wrapped height so that by the time we do get a string wound onto the pin, it will be sitting in approximately the correct location. Otherwise, if we leave the pin too low, when we try and wind the string onto the pin, the pin and string will try to sink below the top of the instrument. This is not only bad for the soundboard, but since the pin can’t really go any deeper, it may also strip out the threads in the pinblock – decreasing its stability and longevity.
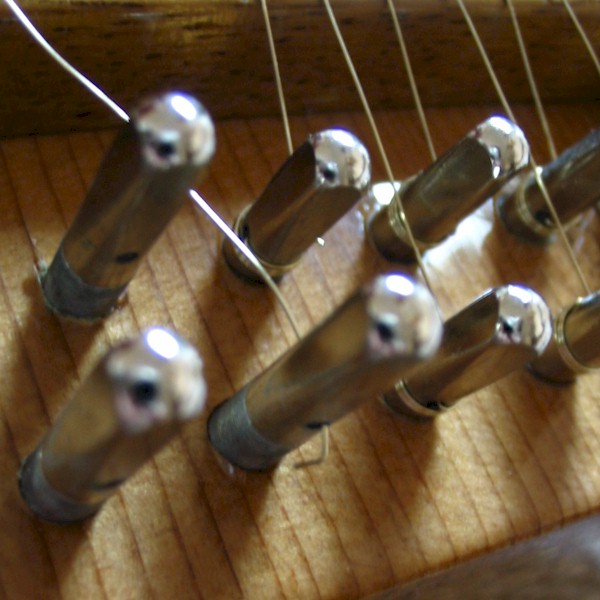
Depending on who built the instrument, and how many wraps were used around the tuning pin, this length will vary. Personally, I like to shoot for about 3 – 4 rotations around the pin. So, I would recommend taking your tuning wrench, and backing the pin out to accommodate roughly three to four full rotations of the tuning pin. Here is a picture to illustrate this:
Again, the idea here is to have the pin end up even with all the others by the time the string has been wound onto the tuning pin. You can see the pin in the above picture is sticking out a good ways above its neighbors; this is what we are after.
From here, all we need to do to replace the broken string is three simple steps: 1) tie the new string onto the hitch pin, 2) wind it onto the tuning pin, 3) and clean up the loose ends. Directions to do each step are shown below:
Preparing for Stringing:
My first piece of advice to you – in order to prevent a lot of fumblings and bumblings – is to clamp your psaltery down to a table or workbench. Obviously, you don’t want to ruin the finish on your instrument, so here’s more on that:
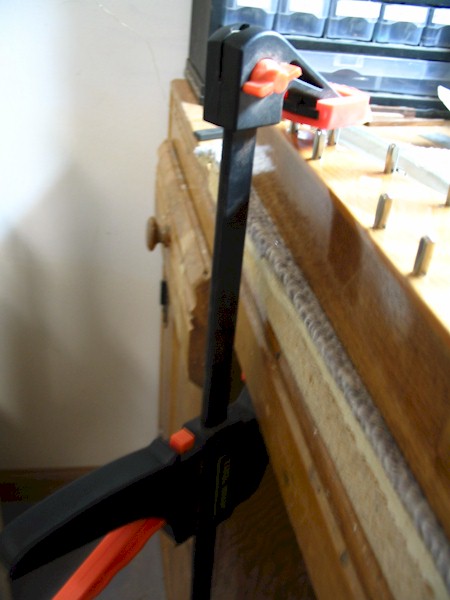
Notice in the picture above that the clamp is actually pressing down harmlessly on two or three hitch pins – not the wood. Also, the instrument itself is resting on a pad of carpet, so the finish on the bottom won’t be scratched either. I’ve found that the best type of clamp for this job is a one-handed bar-clamp, which usually has large plastic guards to keep from marring the clamped material. Probably the most common and widely used of these types of clamps are Irwin’s “Quick Grip” bar clamps, available both online and at most hardware stores.
Now, the basic idea here is to first tie the string onto the hitch pin, and then run it over the bridge and into the hole of the corresponding tuning pin. Then, you wind the string onto the tuning pin by rotating the pin clockwise until the string is reasonable taut. Now, before we jump right in, it will help to be prepared, so I recommend grabbing a few tools.
First, get a pair of wire cutters. Second, get a pair needle-nose pliers. This is used to put a bend in the end of the wire to keep it from slipping out at the tuning pin. Third, I recommend using a pair of vise-grip pliers to help pull the knots tight on the hitch pin. You could use a regular pliers, but I find vise grips, (sometimes referred to as locking pliers), are much easier and safer to use. This is because you don’t have to squeeze when you are pulling on the line, (they lock down onto the wire), which allows you to use all your strength on pulling, and virtually eliminates the chance of slipping.
Tying the String to the Hitch Pin:
This is fairly straightforward. Take a length of string, and thread it through the hole of the hitch pin on the shortest string. Start from the tip and thread about six inches of wire in toward the bridge. Next, wrap one rotation around the pin and bring it back out through the hole, towards the tip of the psaltery, with a few inches of excess sticking out. (This excess is left to easily grab and pull tight with the vise-grips.)
Now, depending on the wire you used, and the size of the hole in your pins, one rotation should be enough to hold the full tension of the string without coming out – but not always. If you happened to use very thin music wire, and/or the hole in your pin is large, you may need two rotations. I used and illustrate just one rotation for this project.
Also, if your psaltery uses ball-end strings, you can skip this step. Simply insert the string through the hole, and thread it up over the hitch pin and toward the bridge. You can then proceed down to the section on winding.
Here’s a video of me tying a piece of wire to one of the hitch pins for the demo psaltery.
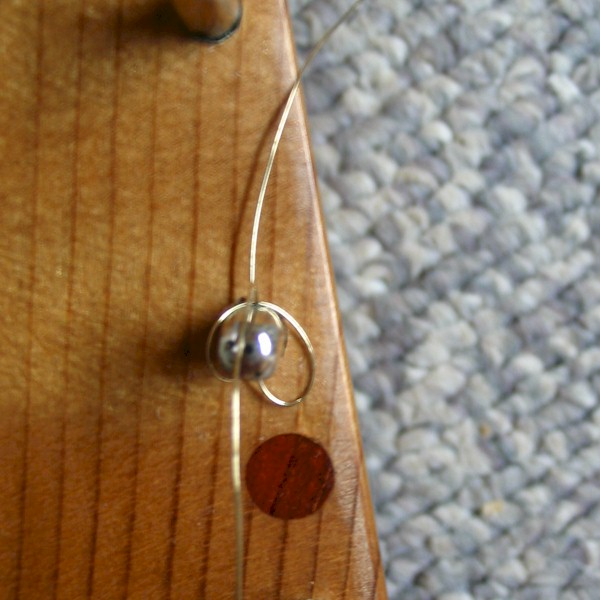
Notice that it doesn’t need to be particularly tight – yet. We will pull it tight and bring everything up to tension once the string is wound onto the tuning pin. If you have dialup or are somehow unable to view the video, here is a photo of what the knot should look like once it is tied onto the pin:
Now, you just have that string dangling there! Onto the next step:
Winding the String onto the Tuning Pin:
This is the hard part. At least, to do it well, it takes practice.
Take the long end of the string that you’ve just tied to the hitch pin, and put it in the groove you made in the hitch pin, and bring it over the bridge and through the hole of the tuning pin. Pull the string somewhat taut and measure out about 2″ beyond the tuning pin, and cut the wire off. This distance will vary depending on a lot of factors, but typically 2″ should be enough for about three to four winds around the tuning pin, which should be an adequate amount to hold the fully tuned tension of the string. If you find that it is slipping, you will need more windings: this is done by increasing the length of string wound onto the tuning pin end.
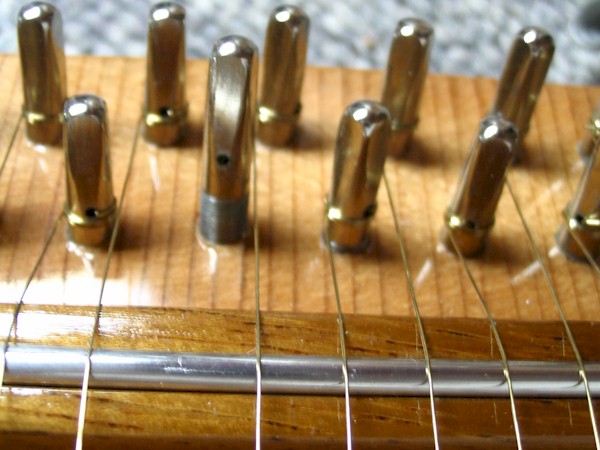
Next, take the needle-nose pliers and bend a sharp downward 90° crook into the wire. I make this hook about 1/8″ up from the end of the wire. This will prevent the wire from slipping out of the pin’s hole while you are winding it. Here’s a picture of approximately what you should now have on the tuning pin side:
One other thing to notice in the above picture: look at the other tuning pins; see how neatly and tightly wound the strings are spooled onto the tuning pins? It is hard to do this on your first try, but try to be as neat as possible. Beyond just looking better, winding the string neatly onto the pin also ensures that the string will not start riding up on the pin. If the string were to start coiling up on the tuning pin, (rather than down), it could eventually make it very difficult to fit a tuning wrench over the pin’s head.
Now, make sure that the string is sitting in the hitch pin’s groove, and pull the wire taut. (If you pull too hard, you will un-bend the crook you put in the end of the wire, so take care.) While you have the string taut, begin with the other hand to use the tuning wrench and wind the tuning pin down into its hole. While you do this, pay attention to where the wire is wrapping itself onto the tuning pin. You want the string to start winding just below the hole and have tightly compacted rows of wire forming just below it.
Keeping the wire taut at all times is the key to controlling where and how it winds onto the tuning pin. All the while, of course, you have to make sure that the string is still sitting in the hitch pin’s groove. This is where you will realize why I recommended clamping the psaltery down. Otherwise, it would take an octopus to do this job.
Continue winding the string until it is taut and firmly resting against the bridge saddle. Take care on your “landing” when the string gets tight enough to make first contact with the bridge saddle. Once the string is fully tightened, it becomes much harder to move the string left or right along the saddle. The string should be tight enough to be able to pluck, and you should hear a nice “ping” sound from the string. Not too tight though, save that for tuning.
Here’s one last video showing how I hold the string taut at all times while winding the string onto the pin.
And, that’s all there is to it! But there are a few loose ends we still need to still clear up.
Final Touches:
Once you have the first string wound onto the tuning pin, don’t bother trying to tune it up to full tension – it will just slip at the knot you tied at the hitch pin. What we need to do is pull the excess wire as tight as possible and trim it back. Here’s a photo of the tightening:
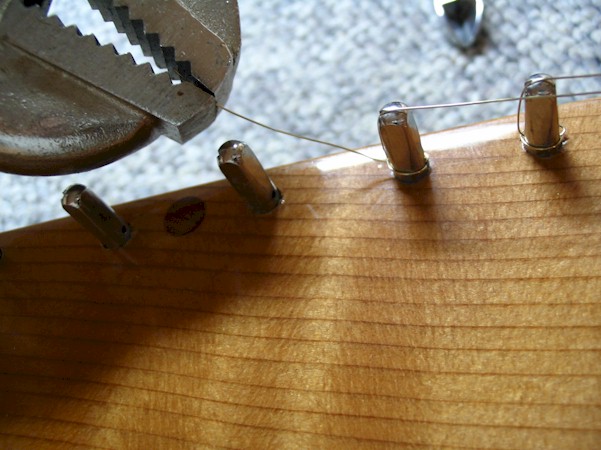
Pretty straightforward. But just be careful, and always pull slightly up and away from the psaltery. Otherwise, if you do happen to slip, well, I can’t imagine that it would be an enjoyable experience – for you or the psaltery. (Just look at the cold, brutal jaws of the pliers above – that ain’t no pillow!)
Please note, avoid using the pliers on any part of the string that will be left on the instrument, especially in the area where it will be bowed. A pliers can very easily put a permanent kink in music wire – even after it has been brought up to full tension.
Doing a good job of tightening the knots will decrease the string’s break-in time because there will be less “settling” that needs to occur. Otherwise, if you bring the string up to tune with loose knots, it will go out of tune because the vibrations shake the slack out of the knot – reducing the overall tension (and pitch) of the string.
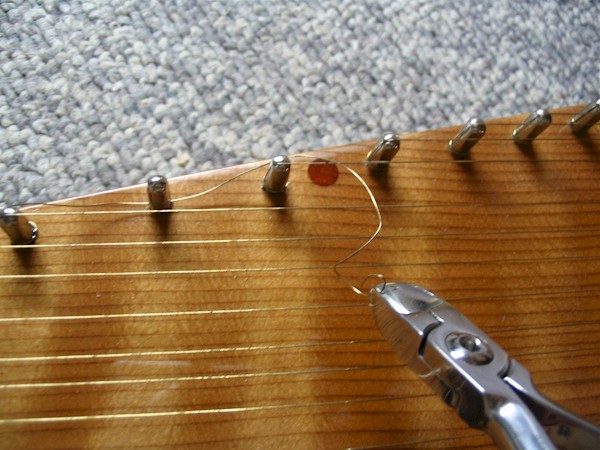
Next, we need to trim off the excess wire. I like to get as close to the hitch pin as absolutely possible. If you leave a length of wire, (especially steel wire), hanging out the pin’s hole, it can possibly cut you when you are playing. Here’s a photo of the trimming process:
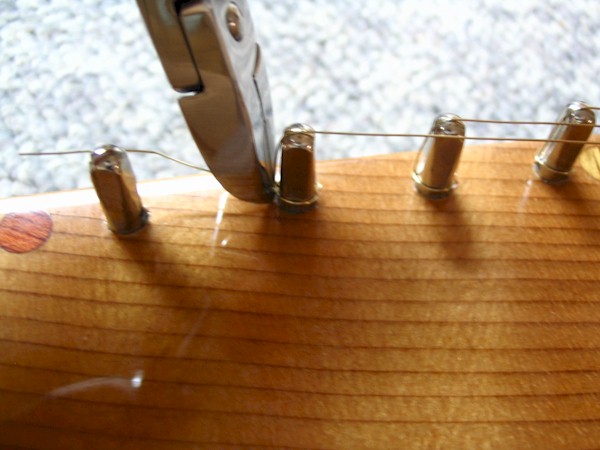
In order to get very close to the excess wire, you need to make the cut with the very tip of the pliers. The pliers’ jaws are quickly fatigued and dulled when cutting with the tip, so make every cut count! Once you are done, run your finger over the edge of the pin several times to make sure that you cut the wire back far enough and that there is no risk of a cut or poke.
Finally, bring the string up to tune and enjoy!