
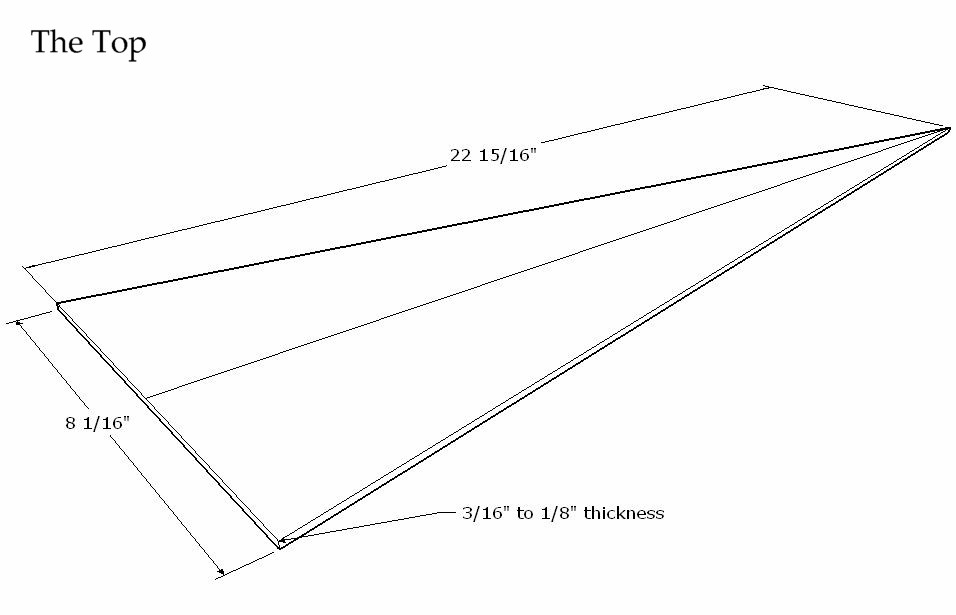
Well, surprise surprise, the top looks to be the exact same size as the back! However, since the top serves a much different purpose than the back, it accordingly should be made of different woods. Here’s the size of the top, in case you missed it from the previous section describing the back:
Again, I felt in order to keep the actual building pages separate from the explanation pages, I have put the reasoning behind why soundboards are made of quartersawn softwoods on a separate page. If you only want to know the whats and hows of building a bowed psaltery, you can skip down to the next paragraph.
Sources of Soundboards:
Finding a soundboard can be as easy as simply using a 1/8″ thick piece of plywood, just as was done for the back. The cross-plies in plywood definitely give it enough strength; but acoustically it can stifle the strings’ vibrations. Like any aspect of this project, if this is your first time, you can use almost anything, and you probably won’t be able to tell the difference anyway.
However, I would recommend using an appropriate solid-wood top for the soundboard. You may have to buy this online, or you could find a gem at your local lumber yard if you know what to look for. There are many sources for quartersawn instrument tops, but one difficulty is finding one that is 23″ long. Acoustic guitar tops are a good place to start if hunting online, (one guitar top will have enough wood for two, possibly even three or four bowed psaltery tops), just make sure that the size is big enough before ordering!
If you are able to resaw lumber up to 4″, or you have a thickness planer, you may be able to find some good boards that can be made into tops at the local lumberyard or woodworking store. Just look for a board that has vertical rings (quartersawn) and is clear and completely free of knots. (Also avoid using the center core of the tree – sometimes called the pith—which is very unstable.) The board you chose should have growth rings spaced as closely together as possible to give it more stiffness and strength. I would generally say no more than ~3/16″ between growth rings.
For the psaltery in this project, I was able to find some nice curly redwood boards locally. After scrounging through the entire pile of wood, I found maybe two or three boards that were suitable to be sawn up into soundboards. I bought one of the boards and resawed it into about three or four tops. The board was also wide enough (8″+ wide) for a one-piece top too. (You can edge-glue a two-piece top if needed – it should still be as strong as a single piece if done correctly. I just use Titebond Original for this gluing task.)
To bring the soundboard down to the right thickness, you can use any one of the methods listed in the previous section discussing the back.
The Soundhole:
Now that we have the soundboard dimensioned to the right size and shape, we just have one last thing to do to it before we glue it to the frame and finish out the soundbox of the psaltery. We need to cut a big hole in it!
That “big hole” is actually called the soundhole. Basically, it’s where the sound comes out. I think of the soundhole as the mouth of the instrument. The soundhole has a lot of flexibility in terms of its shape and location. Basically, any opening (or openings) of the right surface area will work.
In my plans, keeping with the “Psimple” theme, I have chosen to use a basic triangle of the same ratio as the overall dimensions of the psaltery (3:1) for the soundhole. Here’s the plan:
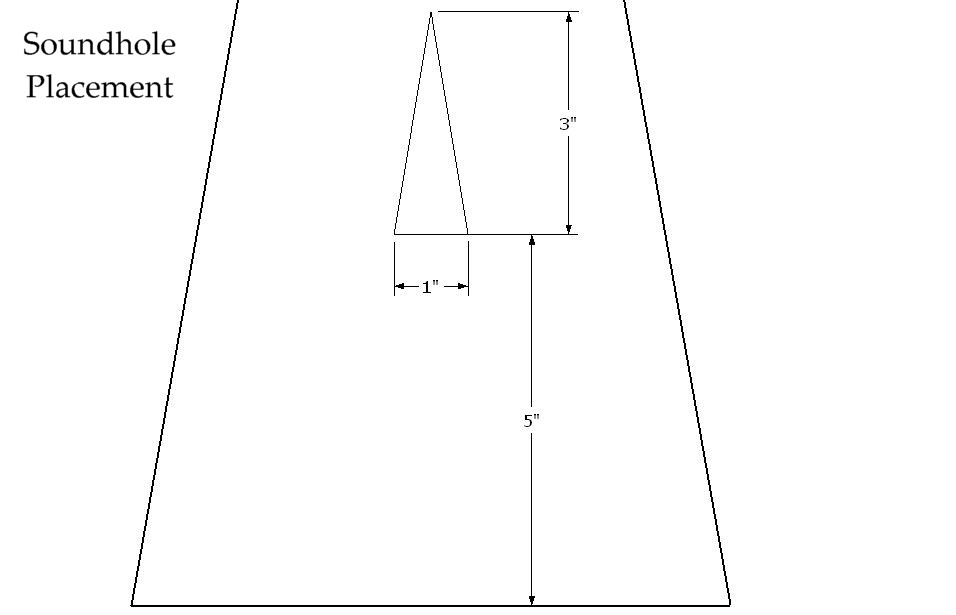
The soundhole pattern above can actually be cut by hand with an exacto knife, repeatedly scoring the soft wood of the top. A scroll saw or jigsaw would also be great, and you could even cut patterns in the top instead of a triangle. Or, you could even drill an array of smaller holes in patterns or in various locations on the top, so long as the total surface area is equal to the triangle’s area.
For those curious, the triangle above has an area of 1.5 square inches. If you just want to drill a big hole, a 1 3/8″ diameter circle would closely match the area of the triangle. For those wondering how I arrived at these numbers, and the sizing of soundholes in general, you can take a slight detour to my page on soundhole sizing; otherwise skip to the next paragraph.
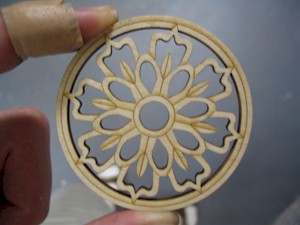
Another common soundhole style is gluing in a laser-cut rose. Basically, you buy a small circular piece of plywood that has been cut into intricate patterns by a laser. You then drill a hole in your soundboard and glue the rosette to either the top or underside of the soundboard, or even mount it flush, provided you drill a hole of the exact size. Roses are available from various locations online, such as Musicmaker’s and Folkcraft.
I should add that I am slowly moving away from using big, circular soundholes whenever possible, or adding a perpendicular strip of bracing to the underside of the soundboard between the bridge and the soundhole. The reason for this is because a giant round hole in the top creates a big cross-grain void, and of course the wood’s strength lies in its grain. So when we break the grain of the wood, especially in this vulnerable area, it can lead to the soundboard sagging down under the weight of the strings more than usual; this is especially true in weaker woods like Cedar.
If you study the shape of a violin’s f-hole, (which, not surprisingly, is somewhat shaped like a cursive “f”), you’ll notice that this design minimizes the cross grain severing of the wood grain. (Conversely, a guitar’s soundhole is a giant hole in the middle – but, it is also reinforced with considerable bracing on the underside of the soundboard.)
Once you have everything set just the way you want it, glue the soundboard to the frame, just as you did with the back. Take extra care to make sure that the area around the pinblock is securely glued to the frame, as this will go a long way in reinforcing the strength of the instrument.
Just to catch up on where we are on this project, here is a picture of my psaltery as it is progressing:
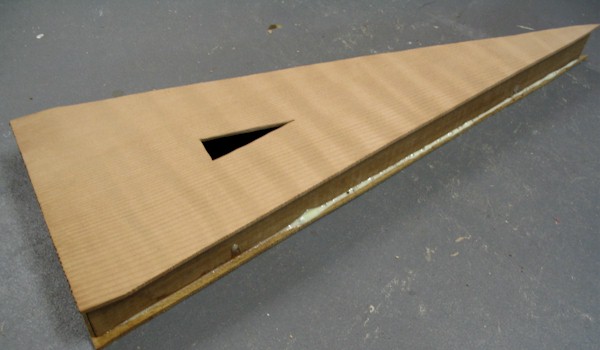
You can see I left extra space around the rim of the instrument so I wouldn’t come up short! I will use a router with a flush trim bit and then some sandpaper to clean everything up and get it looking nice and tidy.
Now that everything has been glued together, do any necessary sanding or scraping to get your psaltery looking and feeling smooth. Once that is done, we are ready to layout the positions of the pins on the top.