
Different builders will begin finishing their instruments at different times, and during different stages of construction. Personally, I like to finish the instrument before I add the bridge, but after I drill the holes for the pins. I do it before the bridge is added because it is much easier to apply and sand the finish without the protuberance of the bridge blocking me; and I do it after the holes for the pins are drilled because the bit can sometimes mar the finish if you are not careful, and also because all that commotion up on the table of the drill press – with the wood chips of 50 drilled holes flying everywhere – is likely to scratch and rough up the finish. (Not to mention that you have to know where the hitch pins are in order to inlay the note markers.)
But when to apply the finish will also depend on the type of finish is used as well. If it is a simple oil finish, it might be safest to drill beforehand. If a thicker film-building finish is used, you may want to apply the finish before drilling the holes for the pins to avoid getting “finish gunk” in the holes. (Or at the very least, clean the holes out with the bit after the finish has dried.) This is especially important for the tuning pin holes, which should be clean and free from debris or residue to make tuning easier.
Considering the Attributes of a Finish:
Choosing a finish for a musical instrument brings up a lot of the same issues that we have encountered when we were choosing a glue – the things that work for common woodworking tasks may not be ideal for instruments. Because of the huge surface area of the finish, especially on the critical soundboard area, one important question arises when considering finishes – one that never comes up with other woodworking projects.
Will this finish inhibit the strings’ vibrations as they travel across the wood?
This is usually the primary concern with musical instruments, and secondarily comes either the durability and scratch resistance of the finish, or its beauty. Dampening is the primary concern, and this is caused mainly by two things: the hardness of the finish, and the thickness of the finish. What we are really after is a finish that affects the sound as little as possible, (yet still protects and beautifies the wood.) This is commonly called acoustic transparency.
Hardness affects the acoustics because a finish that is hard – rather than soft or flexible – will have a less noticeable dampening of the strings’ vibrations. Related to this is of course how thick the finish is built up on the instrument. If a thick, heavy coating is present on the soundboard, it will also absorb a lot of the vibrations and keep them from reaching the rest of the instrument. (This is most apparent when paint is used as a finish.)
Taking into account the hardness of the finish, many woodworkers will immediately think of polyurethane: after all, it is frequently touted as one of the hardest, and most durable of all wood finishes. However, all the claims are simply based on a confusion of terms: we equate a finish’s resistance to be scratched with its hardness.
Polyurethane is actually flexible and elastic, which is what helps to give it a high resistance to scratching. However, this means that polyurethane can have a high dampening effect on the instrument, which is not what we are after acoustically. And not only that, but it tends to be much thicker than most finishes, so it builds up heavier layers on the instrument – compounding the problem.
What we are after is mainly a finish that is brittle. While most finishes that are truly “hard” do not have quite the same scratch resistance as polyurethane, they are superior in terms of acoustics – and with proper care, many have acceptable durability anyway. This isn’t a hardwood floor you’re walking on! – it’s not even a rowdy rock guitar, it’s a bowed psaltery.
Also, if a finish is not brittle, it may be able to make up for it acoustically by instead being thin. Though with thinner finishes – usually ones that do not build up a film finish on top of the instrument – durability can be compromised. On the upside, they are usually also easy to repair.
The most acoustically transparent finishes are those that are both hard and thin.
So, now that we have gotten a little bit clearer understanding as to what things to look for in a finish, it’s time to look at what options are available that fit these criteria.
Finishing Options for Musical Instruments:
- Lacquer – This is probably among the most common of finishes used for musical instruments. It dries hard, (and quickly), and can be sprayed on – either with dedicated HVLP spray equipment in a spray booth, or simply from store-bought spray cans. Regular nitro-cellulose lacquer spray cans are widely available at nearly all hardware, woodworking, and even general stores. One noted item with lacquer is that it can yellow over time – which can almost be considered desirable on darker woods; on lighter woods – not so much. But “yellowing” sounds bad, so we’ll just call it “aging.”
- Shellac – Another common choice for musical instruments is shellac. Shellac can really give mixed results because of one big drawback: once shellac is mixed, it has a short shelf-life. Accordingly, a lot of the pre-mixed shellac that you buy off the shelf can give poor results because it has been sitting in a store for months – if not years. By “poor results” I mean it will remain somewhat soft and won’t fully harden. However, freshly mixed shellac, made from shellac flakes and denatured alcohol, is both hard and durable, and makes an excellent choice as an instrument finish. (This was the finish used on the bowed psaltery for this project.)
- Tung Oil – Tung oil is a fairly broad and somewhat vague term. When sold as 100% raw tung oil, it tends to be soft and does not build much of a film on the wood, but its advantage is that it is very easy to apply. You simply wipe it on, and wipe the excess off. However, tung oil can also be cooked to help it dry faster and harder, (called polymerization), which allows the finish to build up a protective film on the wood surface. This type of finish tends to be harder and more durable than raw tung oil. Lastly, tung oil can darken with age, but usually not as much as linseed oil or lacquer. Various blends and mixes of tung oil are commonly available at hardware and woodworking stores.
- Boiled Linseed Oil – Very similar to tung oil in acoustic properties, linseed oil is also an easy-to-apply, wipe-on oil finish. In the past, linseed oil has been cooked or boiled to alter the oil, which allows the oil to dry much faster and harder. Nowadays, “boiled” linseed oil is not actually boiled at all, but instead chemical driers are added to the raw linseed oil to help the finish fully harden – achieving the same effect as boiling. Regular boiled linseed oil is available at most hardware and woodworking stores. Another choice that has become available is “Tried and True Oil,” which is a truly “boiled” linseed oil, (or at the very least, cooked). Because it doesn’t have any of the added chemical driers, it is completely non-toxic – an unheard-of rarity with wood finishing products. This finish is available from Woodcraft and Lee Valley. (Try to look for a store location locally, and get the “Varnish Oil” variety of the oil.)
- Varnish Oils – This is another very broad and vague term, and encompasses any oil-based varnish. Manufacturers will use just about any name they can think of to get you to buy their products. (IE – teak oil, danish oil, rejuvenation oil, etc.) Some work better than others, but some general rules of thumb can be followed: see if it can be built up to a film finish, or if it is simply rubbed into the wood. Finishes that are only rubbed into the wood tend to be softer, and offer less protection than film-building finishes. They will often emphasize that they are water-resistant, (since when do you get musical instruments wet?) and will sidestep their durability. This is because the finish is in the wood, not on it. (A bullet-proof vest doesn’t do you a lot of good if it is in you, does it?) One well-known and widely used oil finish blend is called Tru-Oil (Gun Stock Finish). It dries fairly hard (for an oil finish) and can be built up to a film on the wood surface. Tru-Oil is available from Birchwood-Casey and Luthier’s Mercantile International.
- Polyurethane – Okay, after all that, I had to list polyurethane as an instrument finish. I know that there are woodworkers out there who are used to using this stuff all the time, and can’t get past the fact that it is acoustically not the best finish. Polyurethane is quite durable, however. If you must use it, I would try and keep the coats as thin as possible, and as few as possible. And as I have mentioned before, if this is your first and only bowed psaltery, you probably won’t know the difference anyway. It will be the best (and only) bowed psaltery finish that you’ve ever used! Polyurethane is widely available at just about any hardware, woodworking, or general store. Probably some of the most commonly used brands are Minwax, and General Finishes, which are simply brushed or wiped on and allowed to dry.
Finishing Tips:
Finishing is fairly straightforward. Follow the instructions from the manufacturer closely, and don’t cut corners. Patience, I believe, is the key to a good finish. Beyond that, here are a few tidbits of advice that I can offer:
- Try to avoid getting drips into the soundhole. Depending on what type of soundhole you’ve used, you can either get creative with masking tape, stuff a rag inside the instrument, or just be very careful.
- Don’t rush things along and try and handle the instrument before the finish is dry. Even when a finish feels dry to the touch, you can easily leave fingerprint indents in the finish if you pick up the psaltery and hold it for more than a few seconds. Wait a little longer between each finishing step than the manufacturer suggests to ensure that everything is cured, otherwise it may cost you a lot more time down the road.
- Pay attention to detail. I would say that traditionally, hardly anything has been more meticulously finished than musical instruments. Even on furniture, typically only the table top is given special attention, with the rest of the body being finished one step lower than the top. Treat the entire instrument as a tabletop! Everything will be seen and held up close.
For a progress update on the bowed psaltery that was built as the project for this website, the pores in the Kwila have been filled with a pore-filler, giving the wood a smooth, glassy surface for the finish to sit on. Then several coats of shellac were applied and rubbed out to an even, glossy finish.
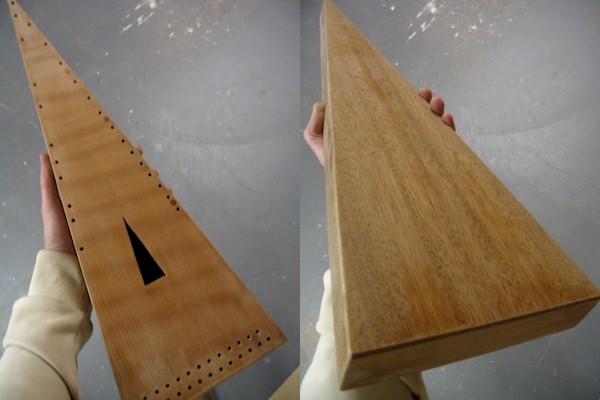
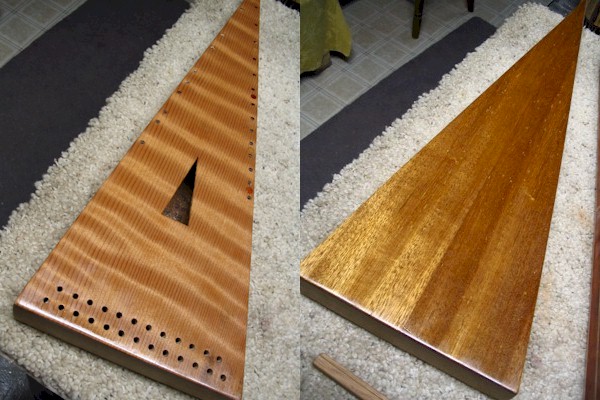
To me, applying the first coat of finish is probably one of the most satisfying parts of the building process. The wood just leaps to life with color and vibrancy. Notice how much more pronounced the curls in the redwood become under the shellac. Also, this is my first experience using Kwila, but the back and sides look beautiful. The color and grain texture remind me of graham crackers. Yummy!
Once the varnishing step has been completed, it’s now time to move on to the step of making and fitting the bridge.